Designing and building a keyboard from scratch - Part 1
I've recently finished a side project: A USB keyboard designed and built from scratch, i.e. not using any kit.
Here it is in all its temporary case glory:

This post is about the why and how.
But why?

Simple. I wanted a keyboard with the following features:
Mechanical switches
The feel and of these switches is amazing. This is something you’ll have to try for yourself. Go to a computer store, into the gaming section and type on the “Gaming” keyboards. Most of them have so called mechanical switches, with different hardnesses, clicks and tactile feedbacks.
For this keyboard, I’ve opted for Gateron Browns just because it was easier to source a bag of these than original Cherry MX. Browns are not clicky and tactile.
Here’s a sound difference, mechanical vs "typical" membrane switches: Youtube
Dual Layout
I type in English and Portuguese. Trying to type PT in a British keyboard is a pain. Technically the two layouts have exactly the same number of keys (ISO layout, used in most countries) but the symbols printed on the plastic keycaps are different. If I configure the operating system to think it’s a Portuguese keyboard while using a British one, then i’ll have to type blindly.
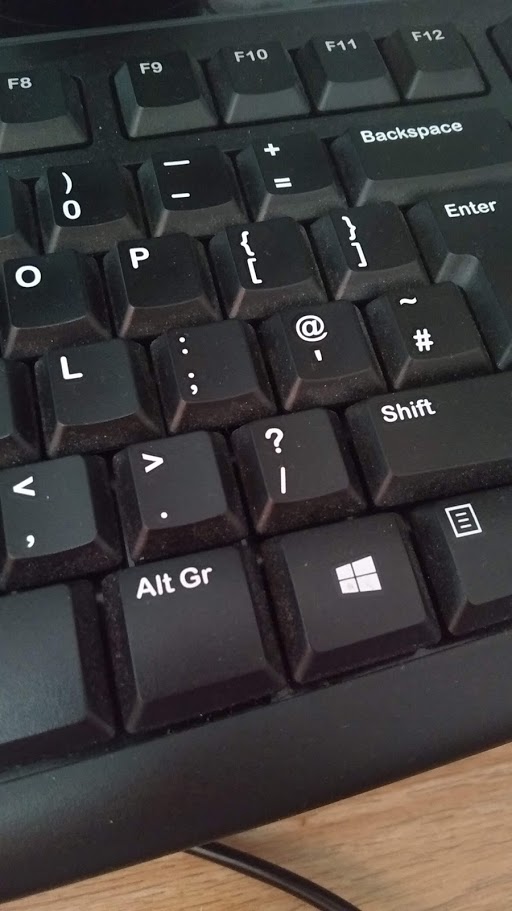
Above: a British keyboard. Good luck figuring out which of those keys map to the following Portuguese symbols: Ç á à é
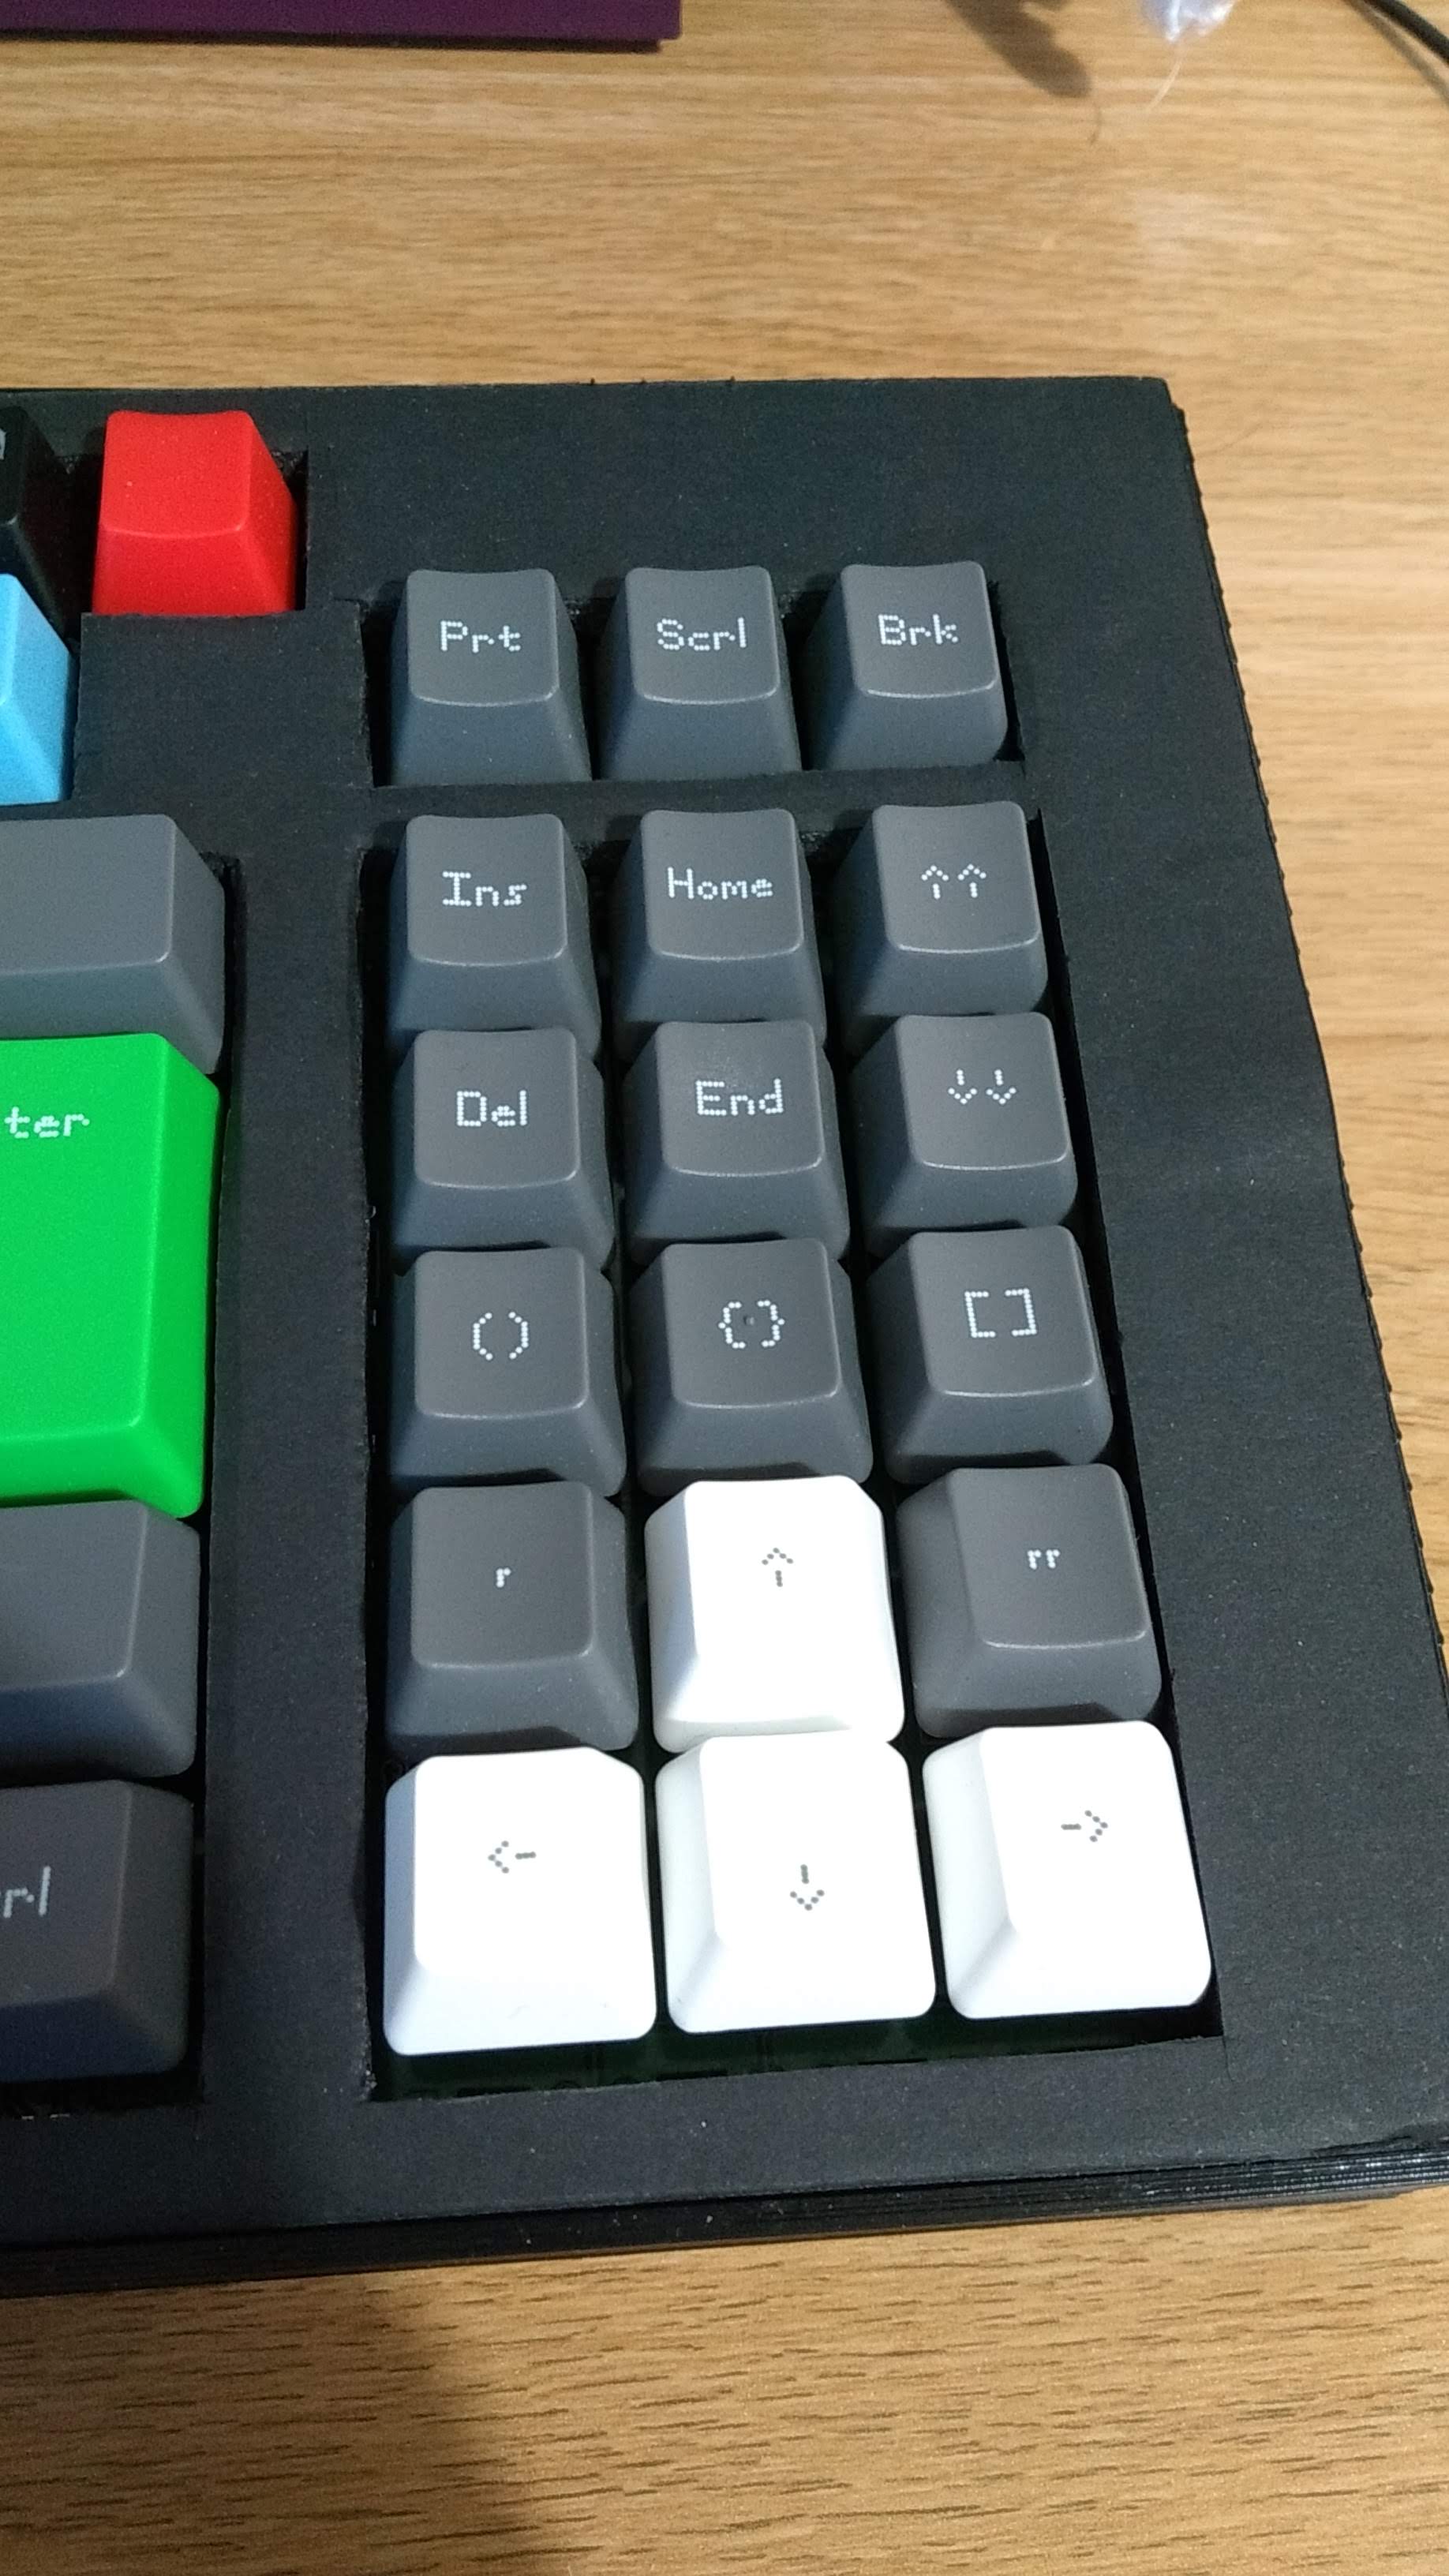
Dedicated keys for common sequences
Depending what you do on your day job I suspect there’s sequences of characters you type over and over. Here’s a bunch them for me:
- “”
- ‘’
- []
- ()
These symbols are almost always entered in pairs. They’re also typed so frequently they should have their own keys. Some do, some don't. On this keyboard, there are fixed keys for these above the arrows. Pressing any of those immediately enters the two symbols followed by a "move left" so the cursor goes inside the pair. It works in a good code editor or even in Microsoft Word!
Yes. I know the top plate looks dodgy at the moment. This is being worked on ;)
Dynamic macros
Beyond the sequences above, there are also sequences of characters you'll type frequently but that change over time.
Perhaps it is your company name, or your user name or a password for a test system? Some examples from me:
Password123(Some password for a development system)function( ) { }new Promise(function(resolve, reject) { })
Code editors have facilities to accelerate these common sequences but they’re dependent on the program you’re typing in. I find it annoying to jump to a different program that doesn't have the same snippets I'm used to.
The idea here is that the keyboard can record sequences and then play them back at the touch of a key.
On this keyboard this was implemented with an extra row of keys above the F row. Called the Macros row.
Here's how you record a new sequence:
- Hit the red record key
- Type normally
- Hit the Mx macro. This will assign everything you typed to that key.
From now on, hitting that Mx key again will replay that sequence. To change it just record again over the same key it. To exit recording mode, press the record button again.
Some commercial keyboards have this functionality but force the user to install a program to manage these mappings. This is silly in my opinion.
Geek fun!
Had a lot of fun building this and feel both proud and amazed that I can actually type with it :) The feel is amazing to be honest.
Nevertheless, I won’t lie, this was a tremendous amount of work! Here's the general recipe followed:
- Design a custom circuit using Kicad.
- Turn the circuit into an actual printed circuit board (PCB) with the help of a PCB manufacturing company.
- Order switches, diodes, connectors, cables, etc.
- Solder the 100 switches + 100 diodes. Replace the soldering iron tip midway because it got knackered.
- Design a 3D model for a case and ask a company to print it.
- Use Inkscape to design the custom print on top of the keycaps (remember: dual GB+PT symbols)
- Assemble everything.
- Write code for the Arduino firmware and program it.
Start to finish it took about 8 months, working on weekends here and there, waiting for parts from China, correcting mistakes along the way... I'd argue it isn't finished yet as I'd really like a machined metal case for it as that was the plan from the start :) maybe one day...
In part 2 I'll deep dive into the technical details: from designing the circuit, getting it printed, all the way to the software running on the micro.
Stay tuned if you're curious about it.